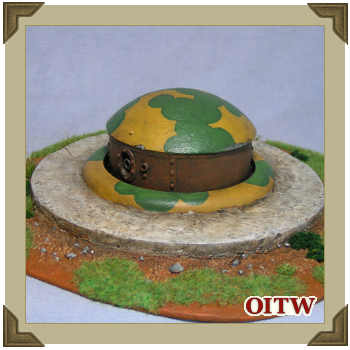
![]() "Mushroom Turrets"
"Mushroom Turrets"
A Panzerfäuste Terrain Article by Tony Harwood
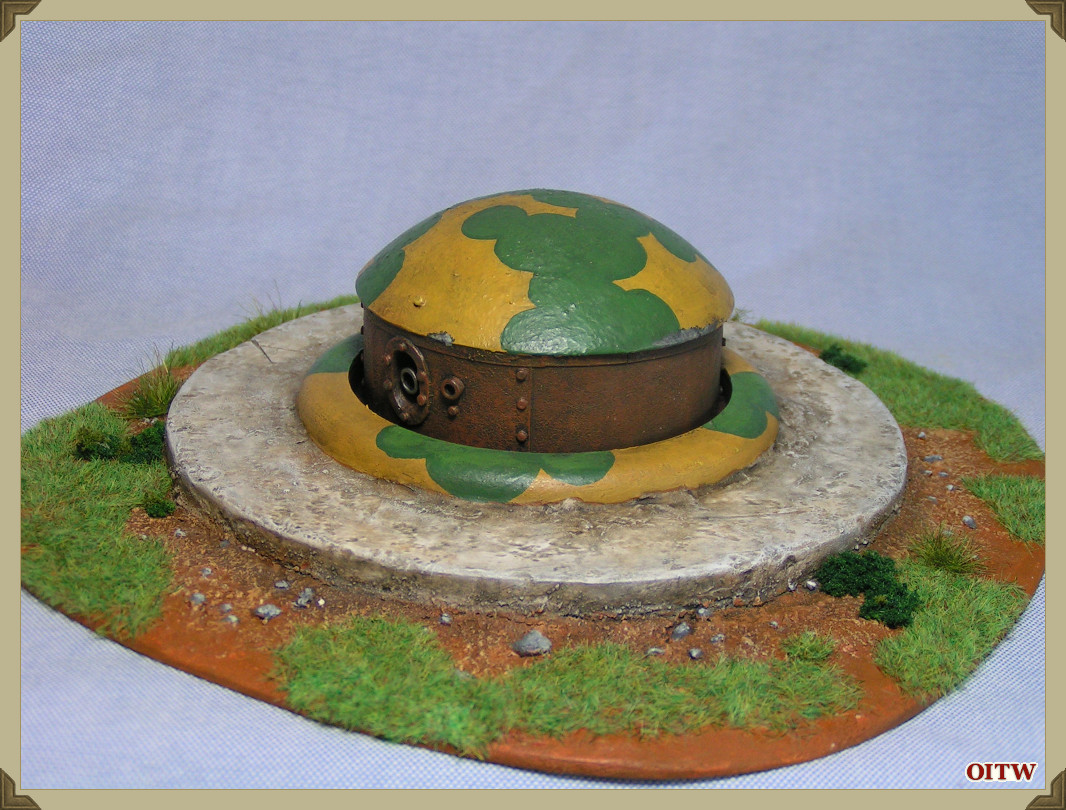
Master modelmaker Tony Harwood presents us with an article on how to build Mushroom Turrets - one of the more visible structures of the failed Gnomish defensive Mon-Gerahnt Line.
~
With the increased threat of Dwarf invasion, Gnome engineers started construcion what was meant to be the greatest line of fixed defences in the whole of The Land, the Mon-Gerahnt Line. Despite never being more than a quarter finished many of the planned huge underground bunkers were actually built. They were constructed, in the main, hidden from direct view with camouflaged entrances and hidden railway systems allowing access to kilometre after kilometre of beautifully engineered tunnels and hidden towns or 'warrens'. Such a system could not be completely subterranean however, requiring both access points and surface defences. One of the more obvious f the the above ground structures were the Mushroom Turrets – iron reinforced domes in huge concrete basins that in principle would be enough to stop any would-be invader trying to find access to the internal network itself.
The turrets were designed to be raised or lowered as needed and with series of both large and small turrets scattereted over the Dûn-Nomin countryside, many Gnomes believed that they were safe from the threat of attack, especially from the Dwarves with whom they had a policy of appeasement going back some time.
The domes, or Mushroom Turrets as they became known, came in many different configurations, sizes and with a wide variety of armourment, unfortunately in the end much like the Mon-Gerahnt Line itself, they didn’t work!
The model detailed here was one of the smaller turrets and as such could make the basis of a simple 'capture the turret' or 'destroy the turret' scenario for some heroic Dwarf Sturmtruppen to attack. You could play the scenario with just Dwarves vs Gnomish Infantry, but that wouldn’t be much fun so don't forget to include some innocent Gnomes who just happen to be out collecting young snails, to add some table top interest.
Construction
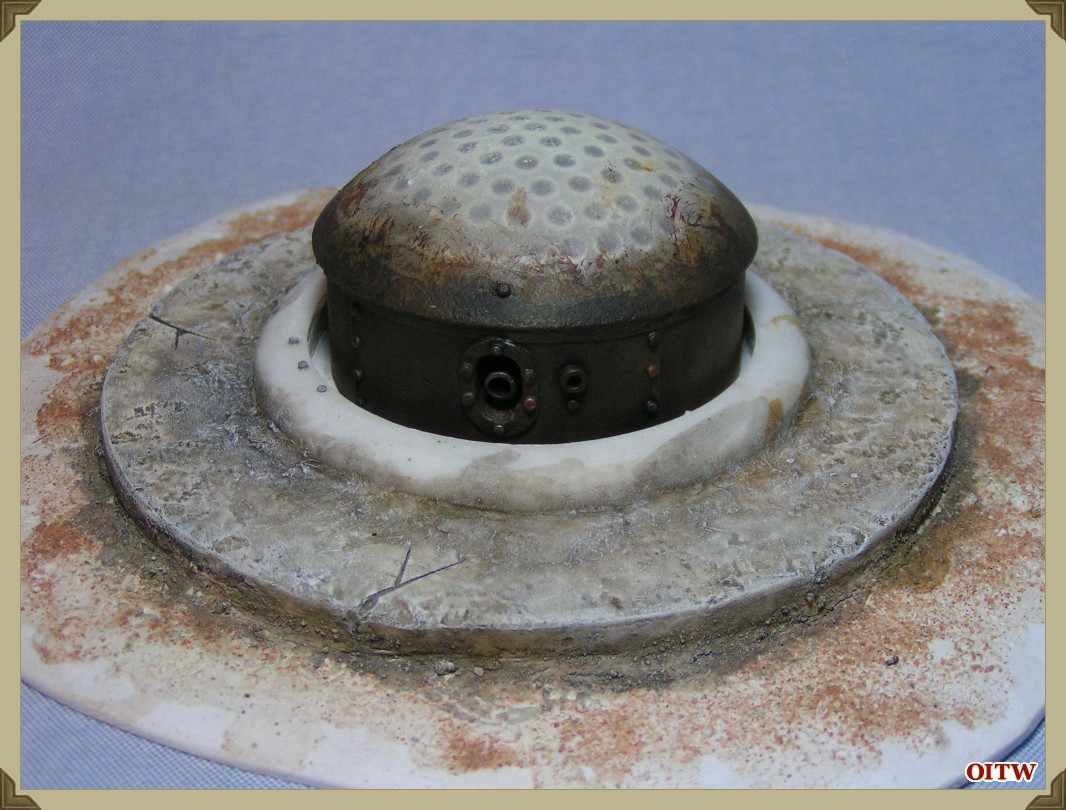
I started with a simple push to operate battery light. I believe that it was purchased from Poundland – for surprise, surprise – One Pound.
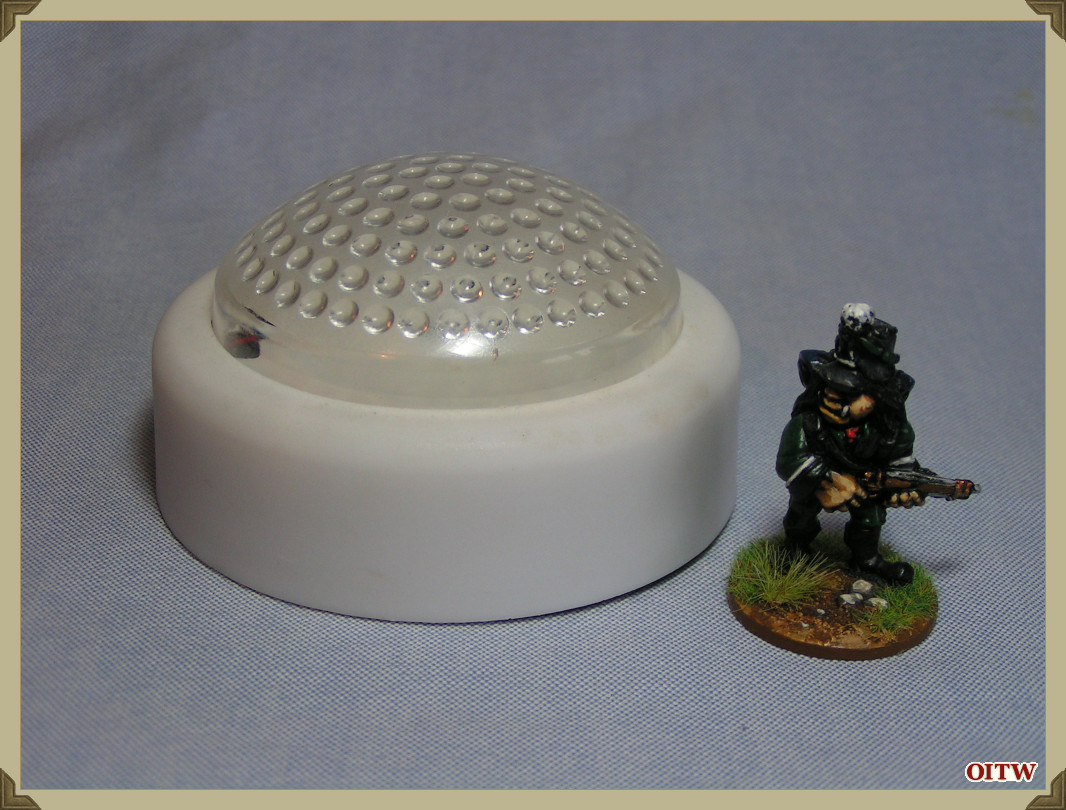
The clear light dome was cut down to just below the top of the dome and the base was cut to form a ring about 7mm tall.
I searched the house for a suitable turret body and in the end found a blue plastic lid of an aerosol can. This was also cut down to the correct height. By placing a snap-off blade onto a wooden block and twisting the plastic lid against the point of the blade, a couple of turns and the plastic will break through.
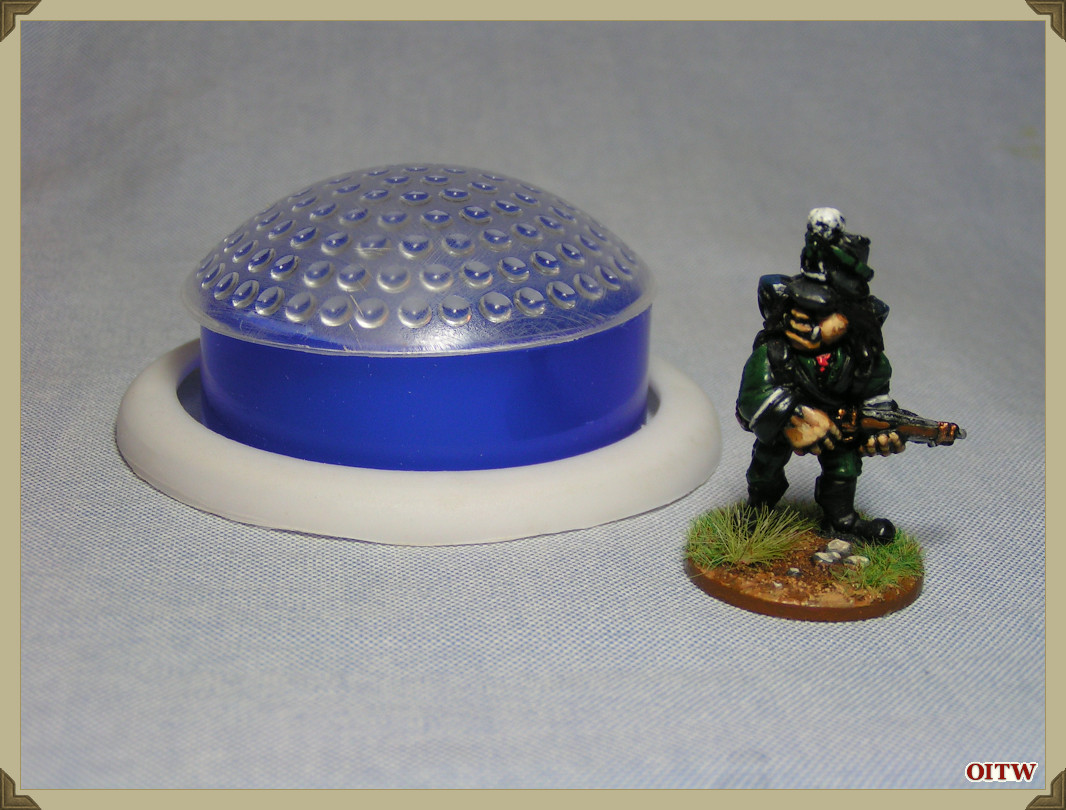
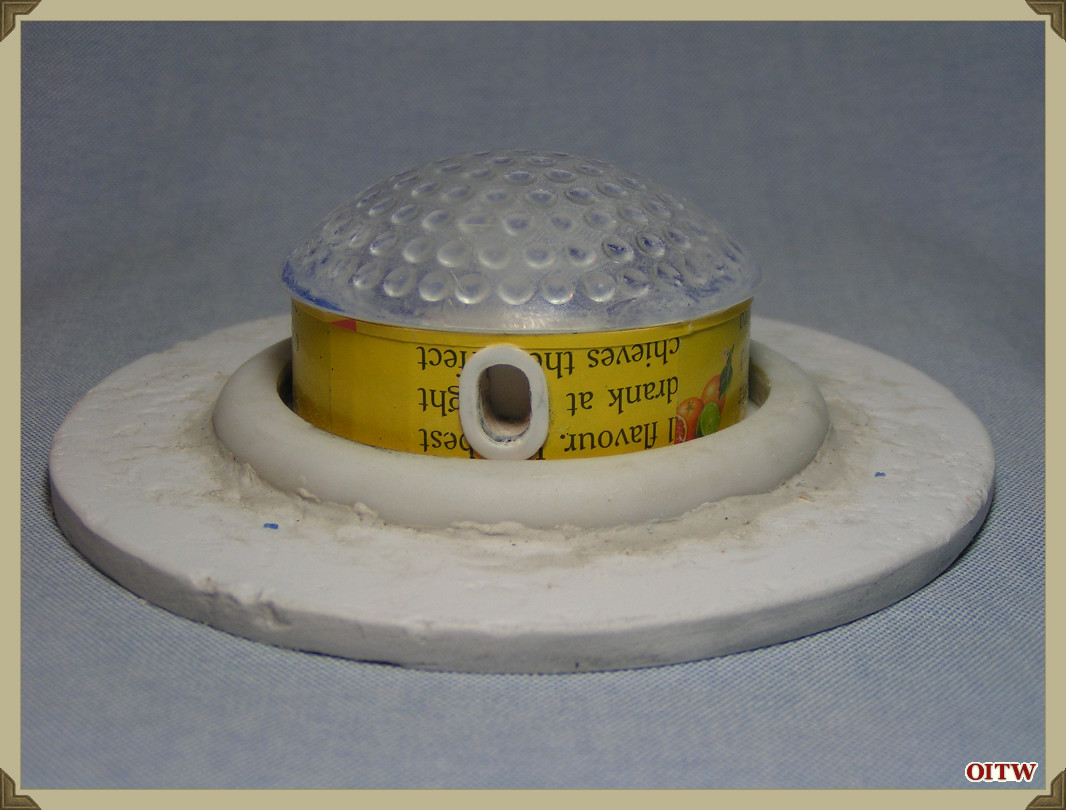
The turret top was glued to the turret body with superglue and I reinforced the internal joint with more superglue and some superglue accelerator. The concrete base was built from 5mm thick plastic card. I drew a circle using a large tea cup as a guide and then cut out the base with a snap-off bladed knife or Box Cutter. To add texture I hit the plastic card base with a large stone and sanded the edges with some coarse sandpaper. When I was happy with the finish I added the white plastic ring (the top of the battery light base) and filled the inside void with DAS modelling clay. More DAS was used to blend-in the reinforced ring to the concrete base.
The turret was detailed with sticky-back paper and then it was time to cut the opening for the main gun. First I added a block of balsawood to the back and marked where the gun would go – on the Mon-Gerahnt Line the guns did not protrude out of the turret fronts as this would have stopped them from being raised or lowered.
The next step was to model the gun opening. This was done with some 1mm thick plastic card which was cut into an oval. When this was glued in place, I drilled a couple of holes and opened up the internal opening with a half round needle file and No. 11 scalpel.
I have glued a small piece of plastic card to the back of the gun opening and used a 4mm plastic tube as the gun. Further detailing was done with more sticky-back plastic and plastic rod rivets added one at a time.
I then started work on the base. I have used some spare 3mm thick plastic card, which I have cut into a rough circle. The groundwork has been built from DAS modelling clay and textured with sieved stones and fine sand which was added over uPVA glue.

Painting
Concrete? What colour is concrete?
I wanted the concrete base to look as realistic as possible so a quick Google Image search and a browse of some books gave me a template. Grey with a slight cream tint and no one colour but subtle variations across the whole surface.
I mixed up some black, white and cream and ‘washed’ the concrete base with a large, soft brush. I speeded up the drying times with a hair dryer and then a second wash, and a third. The last wash was a very slight tint of black and then some cream/white drybrushing to highlight the extreme edges. I think it works, but this is for others to judge.
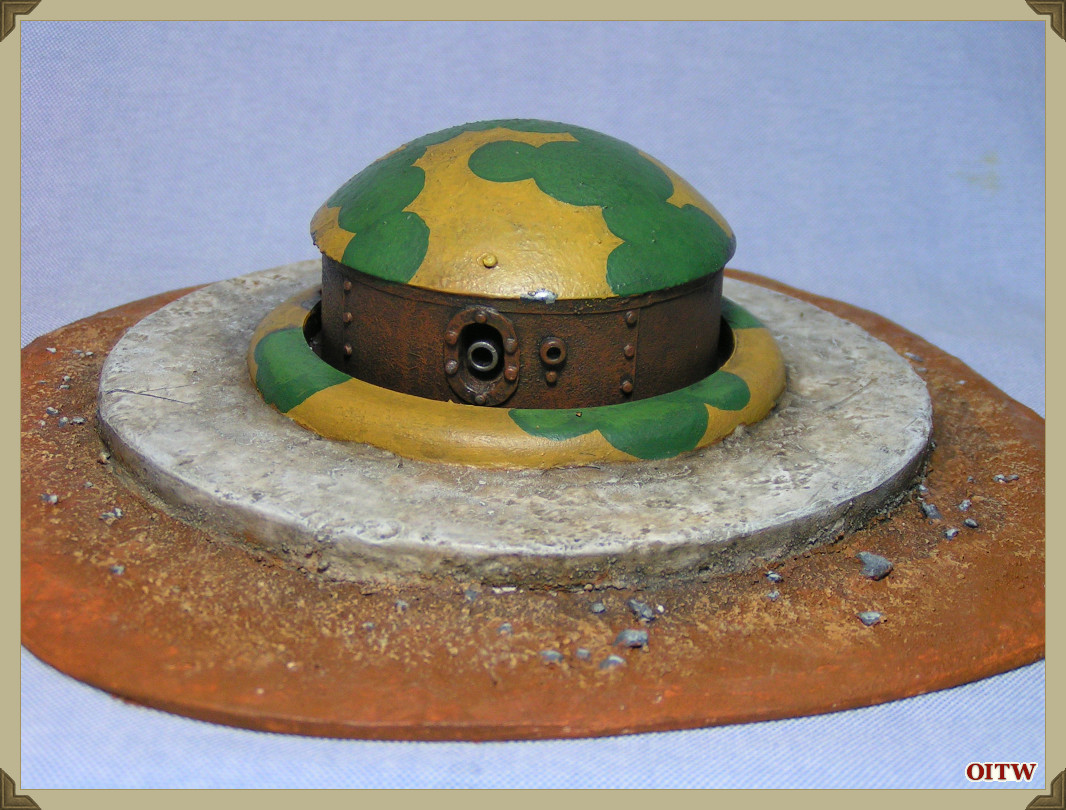
The mushroom turret will have rusted metal sides but a painted and camouflaged top. The sides first; I started with a dark brown base to which I had added some orange. This was stippled on and then a second and similar coat. I built up the orange in streaks and then once again ‘washed’ the whole structure in brown and orange and white washes. Always try and drag the brush up and down the sides to replicate water streaks.
I drybrushed some metallic paint on the very highest areas and then more washes. Subsequent washes have 'browned' the orange but I think it is a realistic colour for aged and rusted metal plates.
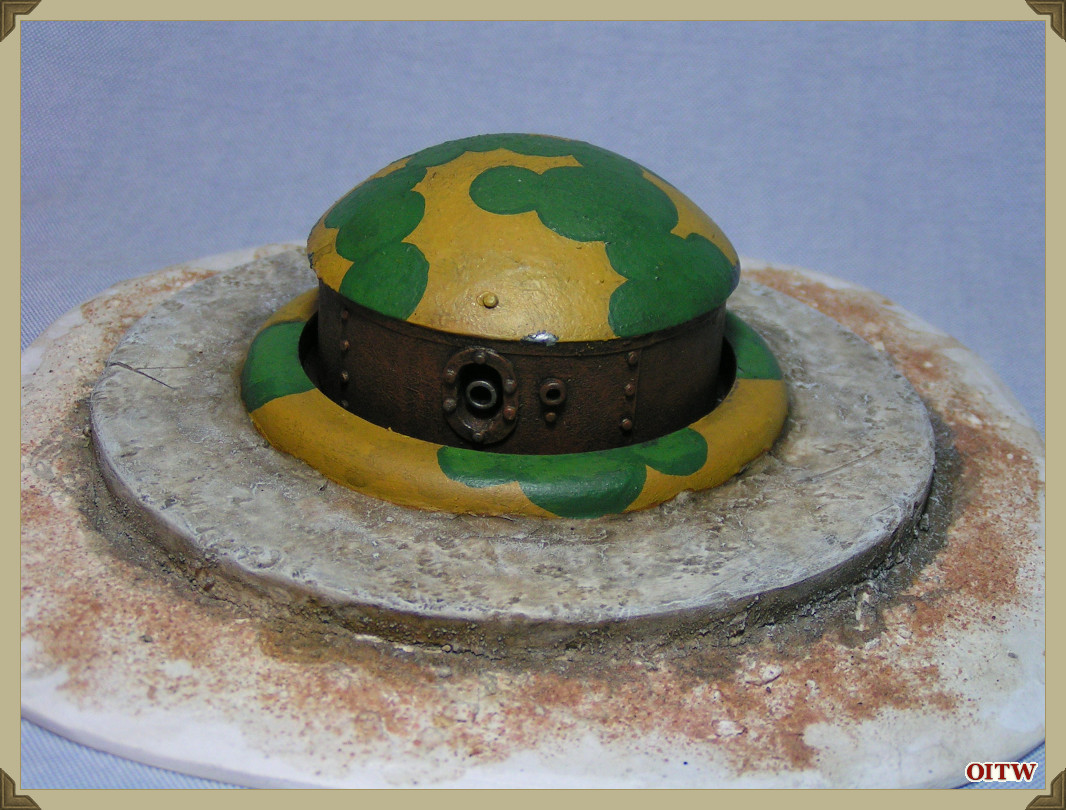
Prior to starting the painting of the Ochre and Green camouflage, I added a couple more layers of lighter brown and orange/brown to the turrets rusted sides. The 'Mickey-Mouse' camouflage was inspired by, but not copied from an illustration I saw in Military Modelling – The Char 2C Super Heavy Tank produced by MENG. I first painted the ochre and then the green. Both colours were highlighter with slightly lighter colours prior to washing the areas with a very dilute black and sepia wash. Once the washes were fully dry, I added some paint chips and a very light drybrush of Gunmetal.
The base or groundwork was painted in various browns, highlighted with Snakebite Leather and Skull White before having individual stones picked out in a mix of grey which was mixed from black and white acrylic paints.
Finally, and prior to varnishing the whole model with Galleria matt varnish, I gave it one final wash, coating both the mushroom turret and base with a dilute black wash.
I have resisted the urge to add any markings as historical research of similar emplacements rarely show any markings. However there might be some graffiti later!
With all the painting and varnishing complete – it was time to decorate the base. I have used a mix of static grass, static grass tufts and some groundfoam which was glued in place with either uPVA glue or superglue.
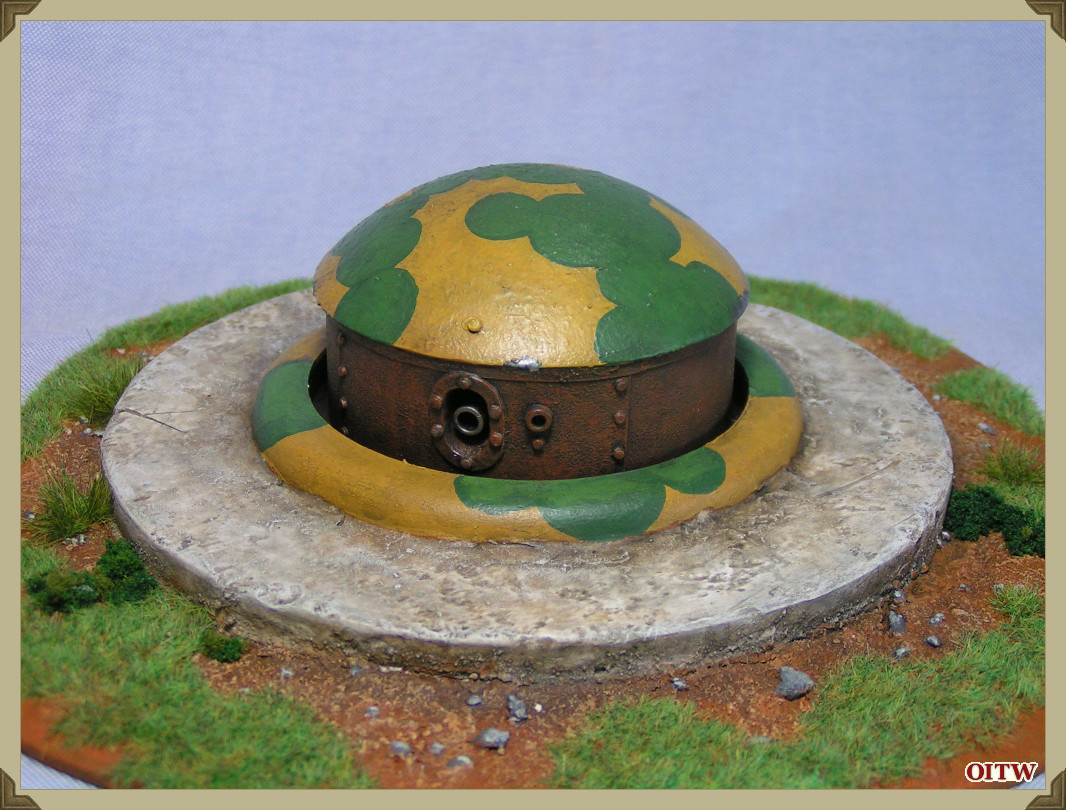
It would have been nice to have had the turret as a separate part and maybe even two turrets one demonstrating it in the ‘up’ position and another in the 'down' position, but in the end, I have superglued the turret into place.
The turret is 60mm across and 45mm tall, the larger concrete base is 120mm across and the larger groundwork base is 160mm x 160mm.
~
Webmaster's Notes
To see the complete many and varied terrain article by Master Modelmaker Tony Harwood, along with his excellent Flintloque scenarios simply click on the maroon tag just below and to the left.
~